Cómo crear una historia 9:16 con cualquier foto
La gente mira en vertical — historias, reels, shorts — pero las cámaras siguen disparando en horizontal. Pon una foto 16:9 en un marco 9:16 y más de la mitad del lienzo queda vacío; los arreglos habituales son feas barras negras o un recorte automático que corta al sujeto por la mitad. Scenelyx cierra esa brecha como es debido: rellena el espacio vertical con un fondo construido a partir de tu propia foto, hace flotar la imagen como una tarjeta de tamaño libre, añade un texto y exporta una imagen nítida de 1080×1920. Todo es procesamiento de imagen preciso y determinista en tu navegador — sin IA y sin subir nada. Esta guía recorre todo el flujo de trabajo.
Por qué las franjas negras fallan en un feed vertical
En un móvil, una historia ocupa toda la pantalla — no hay dónde esconder un borde descuidado. Las barras negras arriba y abajo de una foto horizontal transmiten desidia, y los recortes automáticos de las plataformas cortan caras, productos y horizontes sin miramientos. El espacio vacío no es un detalle técnico; es la mayor parte de lo que ve el espectador.
Los diseñadores lo resuelven con unos cuantos recursos clásicos: una copia desenfocada de la foto detrás, un campo de color que armoniza con la imagen, o una extensión invisible de los propios bordes de la foto. En un editor de escritorio cada uno requiere capas, máscaras y tiempo. Scenelyx convierte cada uno en un solo clic, calculado a partir de tu foto para que el resultado siempre combine.
Cinco estilos de fondo, una sola foto
Desenfoque es el clásico: una copia de tu foto escalada a pantalla completa, muy desenfocada y suavemente atenuada, con ambas intensidades ajustables. Degradado toma el color medio de los bordes superior e inferior de la foto y tiende un degradado vertical entre ellos, así nunca desentona como un color de plantilla. Color rellena el marco con un tono plano — el color dominante de la foto elegido automáticamente, o blanco, negro o cualquier color personalizado.
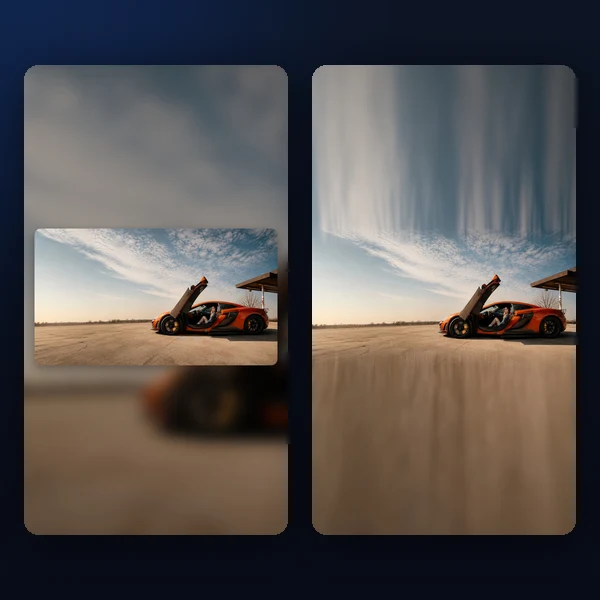
Extender es el estilo distintivo: una banda fina de los bordes superior e inferior se estira hacia fuera para llenar el marco, con un desenfoque gradual y un oscurecimiento suave que crecen hacia el borde y un fundido amplio en la costura. En cielos, agua y paredes la unión simplemente desaparece — y a diferencia del outpainting con IA, no se inventa nada y nada sale de tu dispositivo. Recortar, por último, es un corte 9:16 directo a sangre completa para fotos cuyo sujeto lo permite.
Paso a paso: de la foto a la historia
- Carga una foto — arrastra un archivo a la página, haz clic para elegir uno o pega desde el portapapeles. No se sube nada; el procesamiento es local.
- Elige un estilo de fondo — la vista previa se recalcula al instante, así que probar los cinco toma segundos.
- Encuadra la foto — acerca el zoom, reposiciona y recorta arriba o abajo. El encuadre se aplica a todos los estilos, así que el fondo siempre se construye con la parte de la foto que conservaste.
- Define el diseño y el texto — haz flotar la foto como tarjeta en cualquier tamaño y posición, y añade un texto con su propia fuente, tamaño, color y ubicación.
- Elige 9:16, 4:5 o 1:1 y descarga el JPG o PNG terminado.
La tarjeta: acabado editorial instantáneo
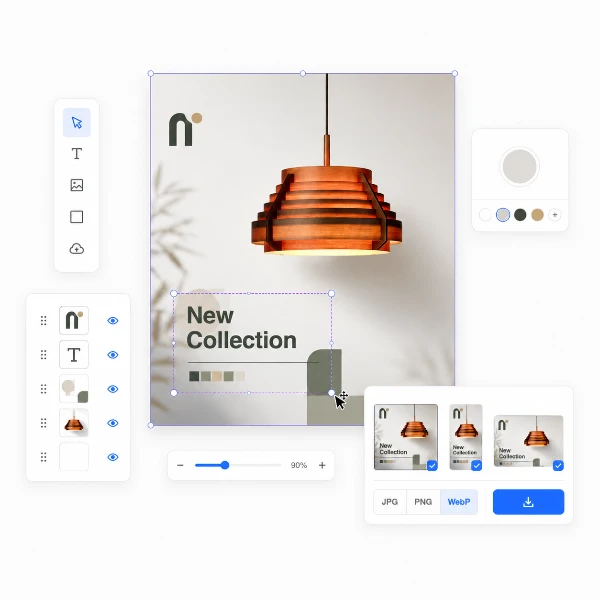
La forma más rápida de que una historia parezca diseñada es dejar de llevar la foto hasta los bordes. La tarjeta hace flotar tu foto sobre el fondo con esquinas redondeadas y una sombra suave, y controlas su ancho, alto y posición libremente — la foto rellena la forma de tarjeta que elijas, y el encuadre decide qué parte se muestra.
Desliza la tarjeta hacia arriba y deja sitio debajo para un texto, fíjala pequeña en una esquina sobre un fondo extendido, o llévala casi a sangre completa con un margen mínimo. Combinada con el fondo degradado, produce el aspecto cohesionado y editorial de una revista — sin una plantilla a la vista.
Encuadre: zoom, posición y recorte
El panel de encuadre reencuadra la foto original antes de aplicar cualquier estilo. Acerca hasta 3× dentro del marco original, desliza la vista en cualquier dirección, y todo lo demás la sigue: el fondo desenfocado se vuelve más audaz, el degradado vuelve a muestrear sus colores y la tarjeta muestra exactamente el recorte que elegiste.
Los recortes superior e inferior son especialmente útiles con Extender. Cortar un primer plano aburrido o una franja ruidosa de nubes antes de extender hace que el estiramiento parta de un borde más limpio, y el relleno se integra aún mejor. Combinado con el zoom, el encuadre elimina por completo el viaje a una herramienta de recorte aparte.
Textos y tamaños de lienzo
Una historia suele pedir unas palabras — un lugar, una fecha, un nombre de producto. La herramienta de texto superpone texto multilínea con tipografía sans-serif o serif, tamaño y color ajustables, colocación vertical libre y una sombra suave que lo mantiene legible sobre cualquier fondo. Suficiente para una portada o un anuncio de tienda sin abrir una app de diseño.
Tres preajustes de lienzo cubren el mundo vertical: 9:16 (1080×1920) para historias, reels, shorts y portadas de vídeo vertical; 4:5 (1080×1350) para publicaciones de feed en retrato; y 1:1 (1080×1080) cuadrado. Exporta como JPG para compartir o PNG cuando quieras salida sin pérdidas.
Tu foto nunca sale de tu dispositivo
Scenelyx funciona por completo en tu navegador con la API Canvas. La foto se decodifica, encuadra, compone y renderiza localmente — ningún archivo se transmite jamás a un servidor. Eso lo hace seguro para productos sin lanzar, momentos privados y trabajos de clientes.
No hay cuenta, ni límite de uso, ni marca de agua. Y como cada estilo es procesamiento de imagen determinista y no IA generativa, la misma foto con los mismos ajustes siempre produce el mismo resultado — sin nada imaginado en tu paisaje.
Crea tu historia ahora
Una foto horizontal no tiene por qué llegar a un feed vertical como una ocurrencia tardía. Cárgala, elige un fondo, encuádrala, hazla flotar como tarjeta, añade un texto y exporta una imagen pulida de 1080×1920 — en menos de un minuto, por completo en tu navegador. Sin cuenta, sin subir nada, sin esperas.
Prueba Scenelyx ahora →